Tools
Here are some tools I recommend.
The links on this page are Amazon Affiliate links. When you purchase using these links, I receive a small commission, but you pay the same price.
Main Tools

Hatchet
For your first hatchet, I recommend buying an older used model like a Boy Scout hatchet. These high quality tools are often available very cheaply at yard sales. If this isn’t an option for you, the Fiskars hatchet is inexpensive and will get you started. ( I do not own this model personally, but it has a good reputation as an inexpensive hatchet.)
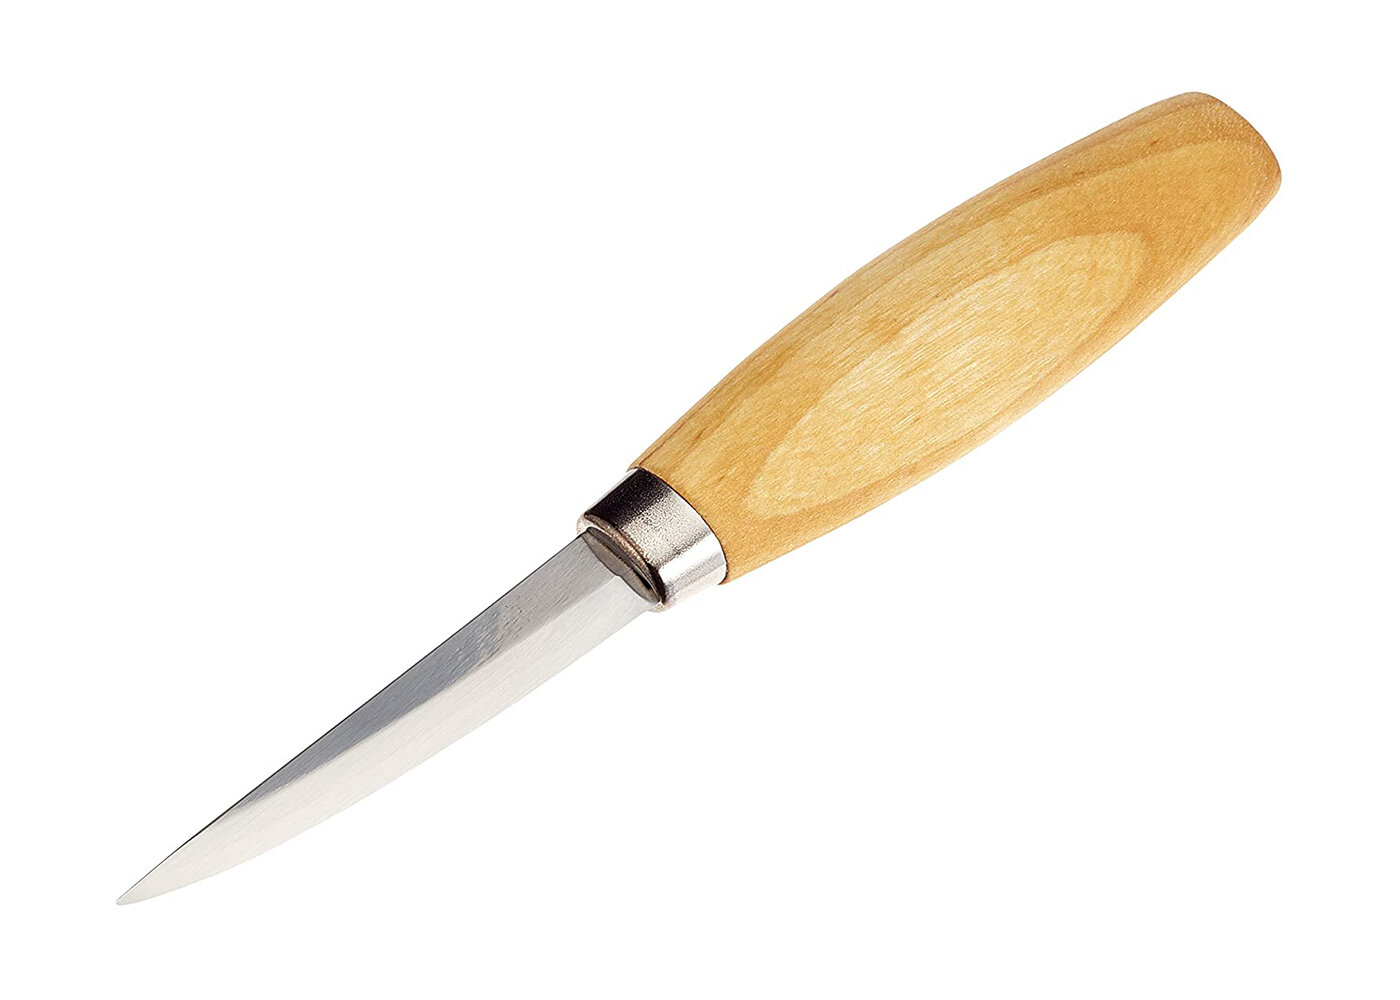
Carving Knife
The Morakniv Wood Carving Knife is an excellent tool at an affordable price. The single-bevel “scandi” grind gives good contact the wood and allows for controlled cuts. The wood handle is substantial and easy to grip and the knife even comes with a sheath.

Coarse/Medium Oil Stone
For sharpening dull edges or regrinding nicked or damaged blades, the Norton Crystolon is a top choice. This artificial stone is durable and needs little maintenance. The gray “coarse” side is aggressive and removes steel quickly. The red “medium” side will refine your edge and prepare it for final honing on a fine stone.

Fine Oil Stone
For decades, naturally quarried “Arkansas Stones” have set the standard for tool sharpening. Even in the age of high-quality synthetic stones, many artisans still prefer natural stones for their finest sharpening. This “fine” stone will complete your sharpening and leave a razor edge on nearly any tool. Unfortunately, these stones have risen in price in the last few years, but they’re still a good value.

Diamond Stone
Since fine oil stones have risen in price, a diamond “stone” is a good, economical alternative. The manufacturer takes a flat metal plate and coats it with a thin layer of industrial diamonds. Diamond stones are extremely effective, require no maintenance, and last a long time. If you don’t want to spend the money on a fine oil stone, this diamond plate is a great alternative. These can be used with no lubricant, but I suggest using water (not oil) to prevent the buildup of metal particles.

Speed Square
A square lets you mark accurate lines perpendicular to the edge of a board. You can buy a fancy square, but a carpenter’s “speed square” is great for beginners. This tool lets you mark lines and measure short distances. It also has a built-in protractor. The model I link to is Imperial, but metric versions are also available.

Tape Measure
You need a tape measure for longer work. Feel free to buy the cheapest one you can find. For a few dollars more, I recommend this Stanley 16’ model. It will measure everything in a woodworking project and the compact size won’t get in your way.
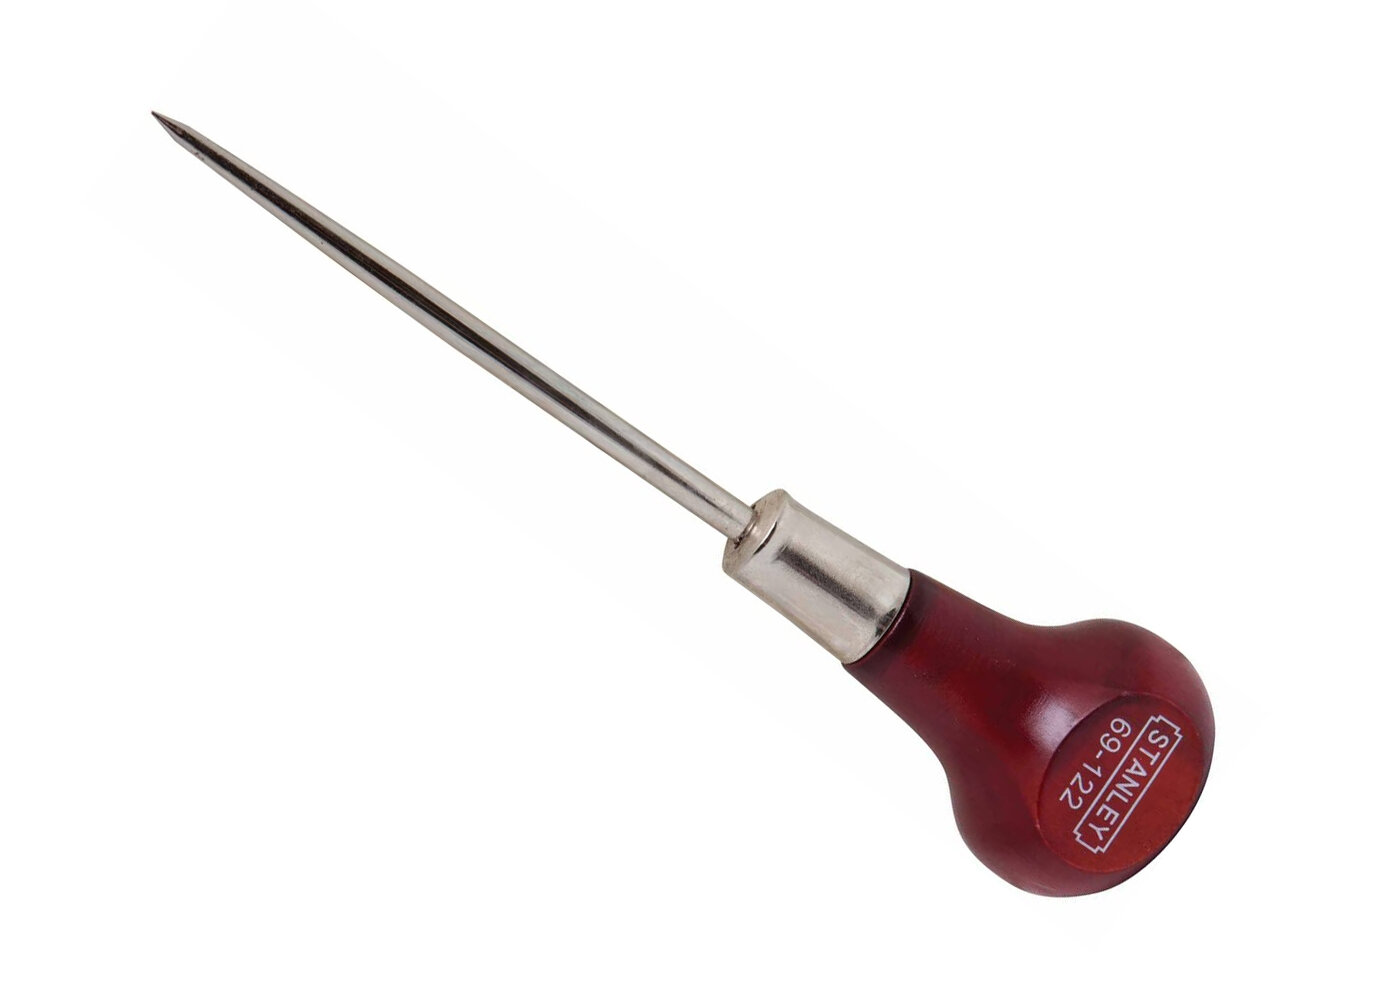
Awl
An awl is a simple tool that lets you poke holes in wood. Little holes are useful for starting a screw or a drill-bit. This model is often called a “scratch awl”, because it will also scratch lines into the surface of your project. It’s perfect if you can’t find a pencil.

Coarse Saw
You need one aggressive saw for quickly breaking down lumber into smaller pieces. I’ve had good luck with this Dewalt Panel Saw. This is a rough tool with big teeth, but it cuts quickly and easily. This is a “hard point” saw that cannot be sharpened. You use it until it gets dull and then recycle it. Luckily, these hard teeth stay sharp for a long time; maybe years.

Fine Saw
You also need a finer saw for smaller and smoother cuts. This Ryoba saw is much thinner than our coarse saw and it has smaller teeth. This is a Japanese saw and it cuts on the pull-stroke, which takes bit of getting used to, but it also has two sets of teeth: one for ripping along the grain, and one for cross cutting across the grain. These features make the saw very versatile. For many projects, this is the only saw you will need.

Cordless Drill
For beginners on a budget, my favorite drill is the old-style “brace.” You can often find these very cheaply at yard sales and flea markets. But if you can’t find a brace, a good cordless drill is the best alternative for power and portability. The drill shown here is a great balance between performance and affordability. I’ve owned this drill for years and always been happy with its power and long battery life. If you need something less expensive, don’t be afraid to try a more budget-friendly model; even a basic drill is plenty for beginner projects.

Bar Clamp
An inexpensive clamp will hold your work steady while you saw or drill it. This bar clamp holds tightly and a small enough to fit with your other tools. Later on, you might buy more of these but a single clamp will get you started.

Handscrew Clamp
For holding smaller items or gripping things with extra force, it’s hard to beat the old-fashioned hand-screw clamp. By using two independent jaws and two screws, this clamp puts maximum pressure on the work. It also sits flat on your work surface to grip small pieces for detail work. The clamp pictured here is a high quality (but pricey) Jorgensen model, but I’ve found even cheaper hand-screw clamps work well. Buy whatever is in your budget.

100-Grit Sandpaper
Most people know that sandpaper can make wood smooth or get it ready for finishing, but people don’t realize that sandpaper is also a powerful and inexpensive shaping tool. Professional woodworkers use expensive rasps and files to shape details and smooth curves, but a simple piece of sandpaper glued to a scrap of wood is almost as good. This 100-grit paper is good for rough sanding and general shaping. This brand of paper is expensive, but it’s the most long-lasting I’ve ever tried. It’s cheaper in the long run.

150-Grit Sandpaper
For finer shaping or preparing wood for finish, 150-grit sandpaper is a good choice. For most projects, I find 150-grit to be fine enough to get my final surface.
Supplies and Accessories
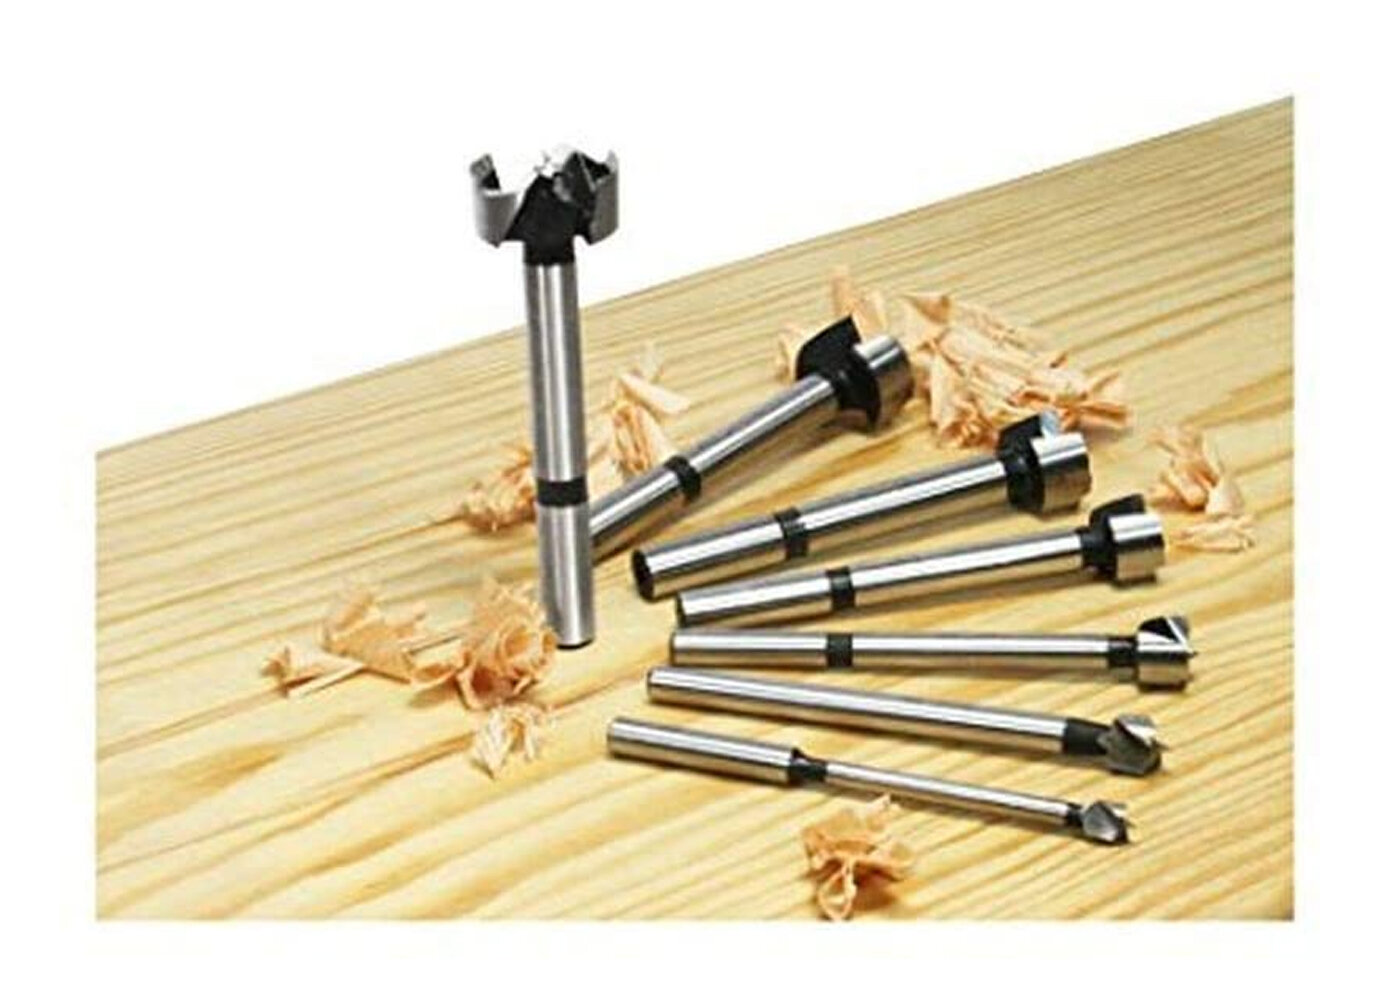
Forstner Bits
These drill bits are my first choice for woodworking projects. They work quickly, leave a clean hole, and stay sharp a long time. These will work in a brace, but they’re much better in an electric drill. The set pictured here is somewhat expensive, but well worth the investment.

Spade Bits
These are my favorite inexpensive bits and I use them often. Spade bits work best in an electric drill, but I have also used them in a brace. This set has all the sizes you need for regular work, plus two larger sizes that are handy when drilling the holes for workbench legs.
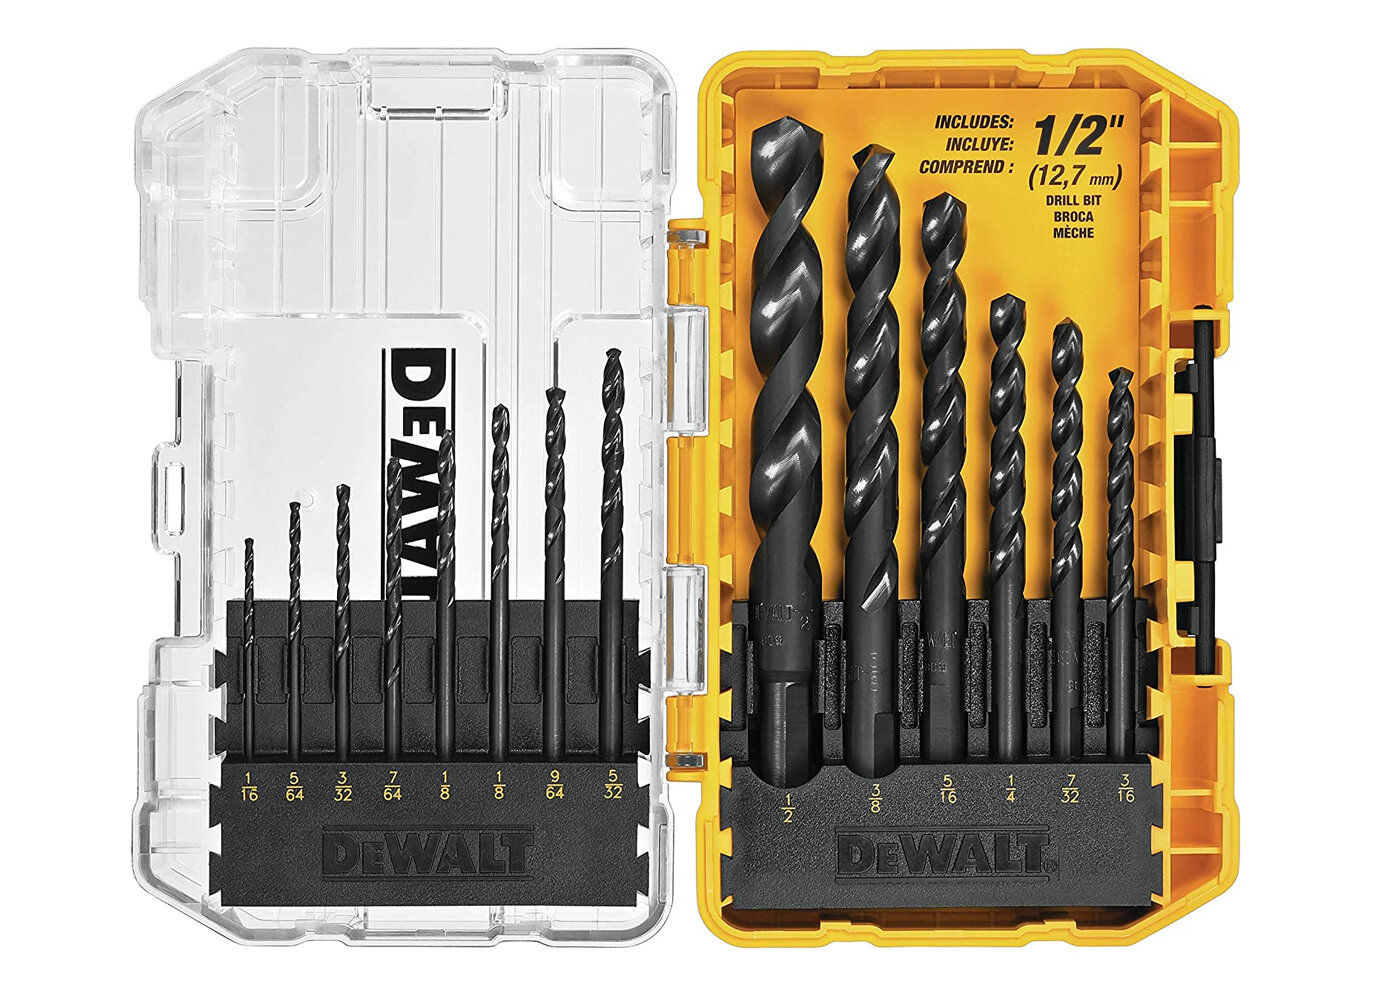
Twist Bits
These simple drill bits are designed for drilling metal, but they work well in wood, especially for smaller size holes under ½ inch. If you’re drilling pilot holes for screws, twist bits are perfect for the job. The set pictured here is good and inexpensive, but even cheaper twist bits are fine for general woodwork.

Honing Oil
Your sharpening stones must be lubricated with oil. A generous coating of oil keeps fine particles of metal from getting stuck in the stone’s pores and clogging the stone. 3-in-1 oil is a lightweight lubricant perfectly suited to sharpening. It also prevents rust, loosens rusted parts, and keeps the screws and knobs of machinery moving freely. This is the only oil I use for 99% of my work.

Honing Compound
For the finest edge on your tools, you’ll want a strop: a piece of leather glued to a scrap of wood. (There’s a video about making a strop on the videos page.) Your strop will be much more effective if you coat it with a honing compound. This green, chromium oxide compound is meant for polishing steel and it will help bring your tools to a razor-edge. This small block of compound is economical and will last you for years.

Wood Glue
Common, yellow wood glue is a good all-around adhesive for your projects. This glue is non-toxic, cleans up with water, and once dry, it’s stronger than wood.

Spray Adhesive
3M Super 77 spray adhesive is great for bonding paper or leather to wood. I use it for making sanding sticks and strops. It bonds nearly instantly and holds for a long time. This glue is flammable and the flumes are dangerous. Use it outside or in a well-ventilated space.

Shelf Liner
I use shelf-liner to pad my work and keep things from sliding around. Wrap this flexible sheet around a part to keep clamps from damaging the surface. Put a small piece of this liner under your sharpening stone to keep it from sliding around your bench.

Boiled Linseed Oil
My favorite “fast” finish. Boiled Linseed Oil can be wiped on with a rag and it dries quickly while bringing out the grain in wood. This is not a very durable finish. For more protection, use Shellac or Polyurethane (listed below.) Boiled Linseed Oil heats up as it dries and rags soaked in BLO can spontaneously combust. Dispose of your finishing rags in a can of water or place them outside to dry.
Shellac
Shellac is another quick and easy finish that also provides good protection. Shellac can be brushed on larger projects or wiped onto smaller ones. It dries in 10 minutes and is ready for recoating. With this schedule, you can easily put on three coats in a day. In between coats, I recommend scuffing it with 0000 steel wool (listed below). Shellac is non-toxic when dry and offers good protection from dents and water. The final finish can be buffed out with paste wax (listed below).
Polyurethane
When you need maximum protection on your project, polyurethane is a good choice. It gives an attractive and very durable finish that you can easily apply in a home shop or outdoors. Many beginning woodworkers try to get perfect “gloss” finishes and they get frustrated with scratches or dust specks. For an easier finish that still looks great, I recommend “satin” or “semi-gloss.” Like shellac, polyurethane can be rubbed out with steel wool and paste-wax. Polyurethane is flammable and toxic and produces a strong smell while drying. Use this product in a well-ventilated area.

Paste Wax
Once hard finishes like shellac and polyurethane are dry, you can improve the final look by rubbing them out with paste wax. This product has been around for decades and it gives a smooth and inviting final finish while minimizing small mistakes and uneven areas. I apply this wax with steel wool (listed below) and then buff the surface with a piece of old t-shirt.

Steel Wool
This very fine abrasive is perfect for rubbing out final finishes or scuffing between coats. Steel wool will leave tiny particles on your work, so use a rag or magnet to clean your work after steel wool.